
Putting together this pallet garden furniture is as easy as 1, 2, 3. In this walk-through guide, I will show you how to make furniture with pallets for your garden.
Using just three pallets, minimal tools, and all for zero cost!
Over the years I’ve built a number of different pallet garden furniture. Through lots of trial and error, I have come upon the quickest and cheapest shortcut, on how to make a pallet sofa for your garden.
Below is the step-by-step process, including pictures, on how to make a pallet sofa for your garden, as well as video instructions at the bottom of the post.

Tools required
- Impact Drill or Rotary Drill
- Wood Screws (4.0 x 40)
- Tape Measure
- Hand Saw
This project requires 3 x wooden pallets, of roughly the same size and shape. Finding used wooden pallets for free is just as easy, as this simple guide on how to make a pallet sofa for your garden.
Difficulty Level
Following the below step by step guide even the most basic DIYer should be able to build their own pallet furniture with ease.
It should take around 20 minutes for the initial build and then an further optional 20 mins, if you wish to sand and paint the furniture to your liking.
Safety Precautions
Whilst working with pallets please be aware that reclaimed wood will likely come with rusty nails, splinters and sharp edges and when using power tools, read the provided safety manuals before operating. Below is a list of recommended PPE to wear whilst building your furniture.
- Safety Goggles
- Heavy Duty Work Gloves
- Ear Defenders
- Respirator
- Steel Toe Cap Boots
- Shin Pads ….Joke!
Pallet Furniture: Step by Step Guide
Step One:
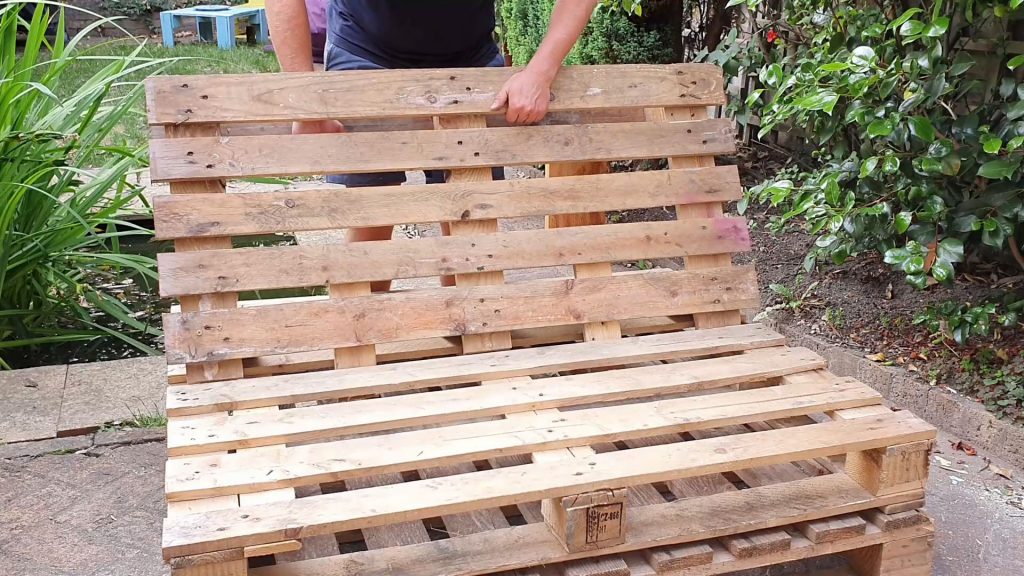
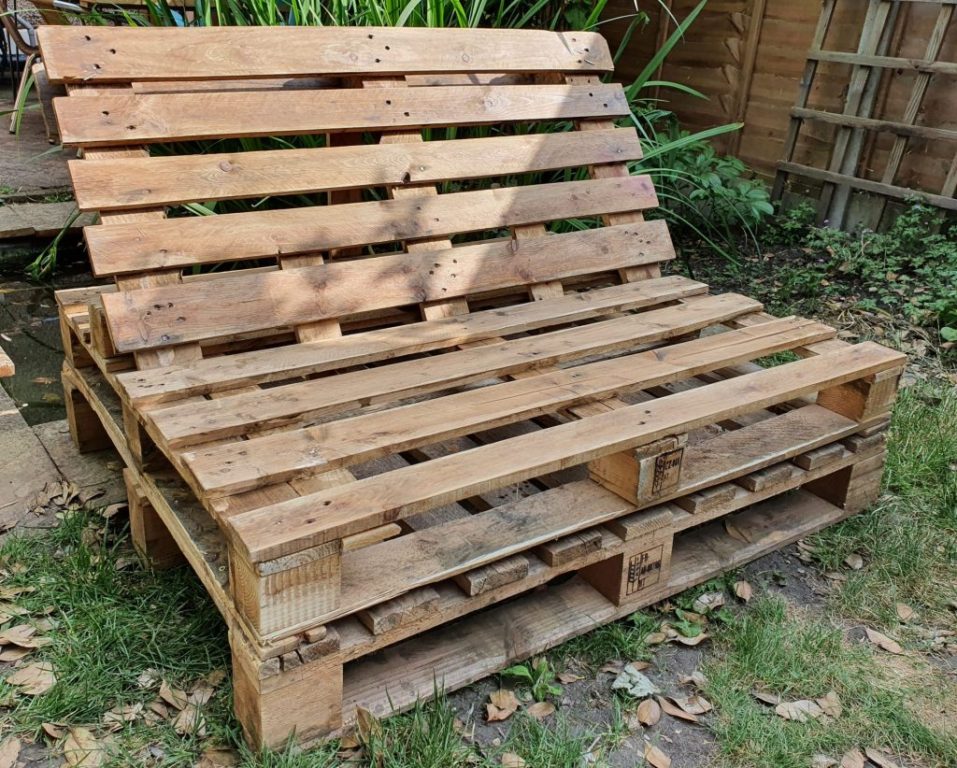
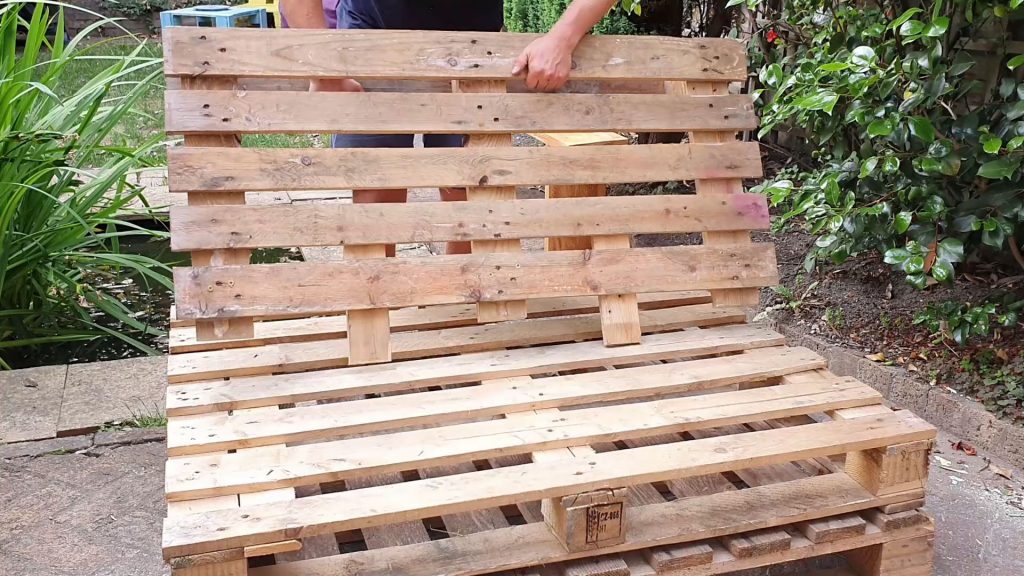
- Place your three pallets on top of each other, aligning them so they’re all facing the same way.
- Making sure, the two nicest looking pallets you have, are at the top of the pile.
- These two, will eventually be the ones on display, as the back rest and seating area.
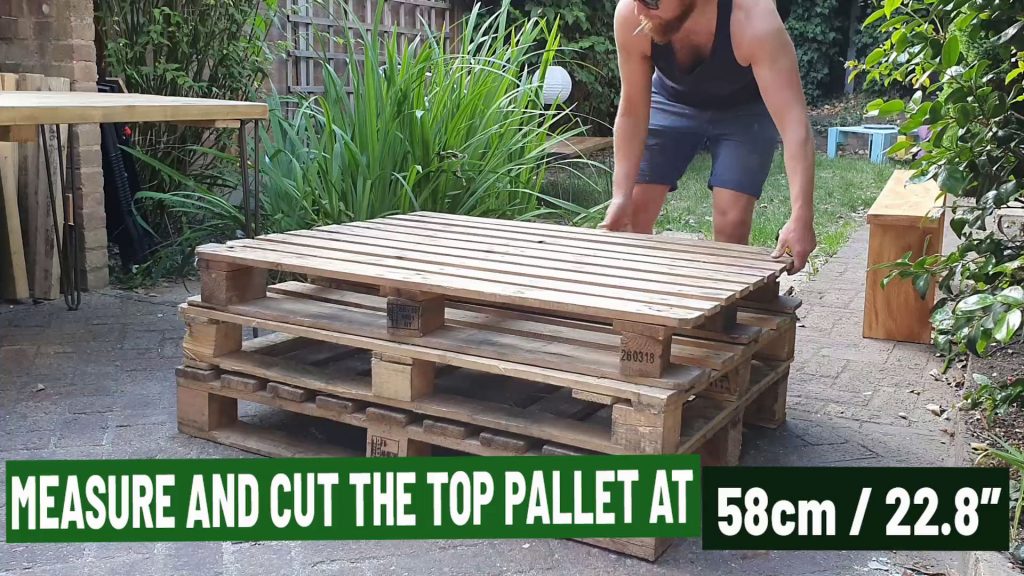
Step Two:
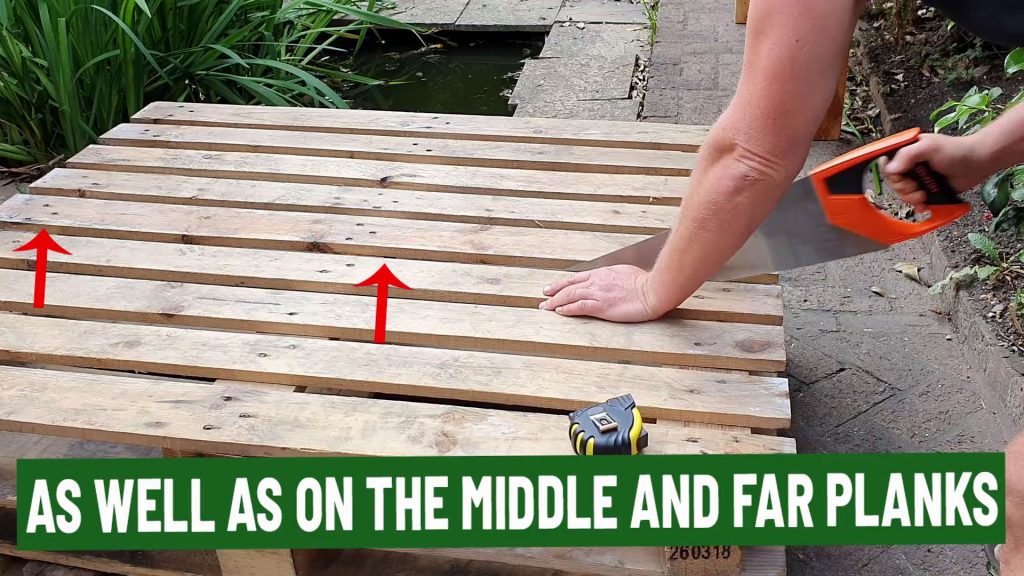
- Measure 58cm from the back of the top pallet coming forward.
- After making your measurements, cut horizontally along the three planks, separating the top pallet in two.
Pallet Furniture how to make steps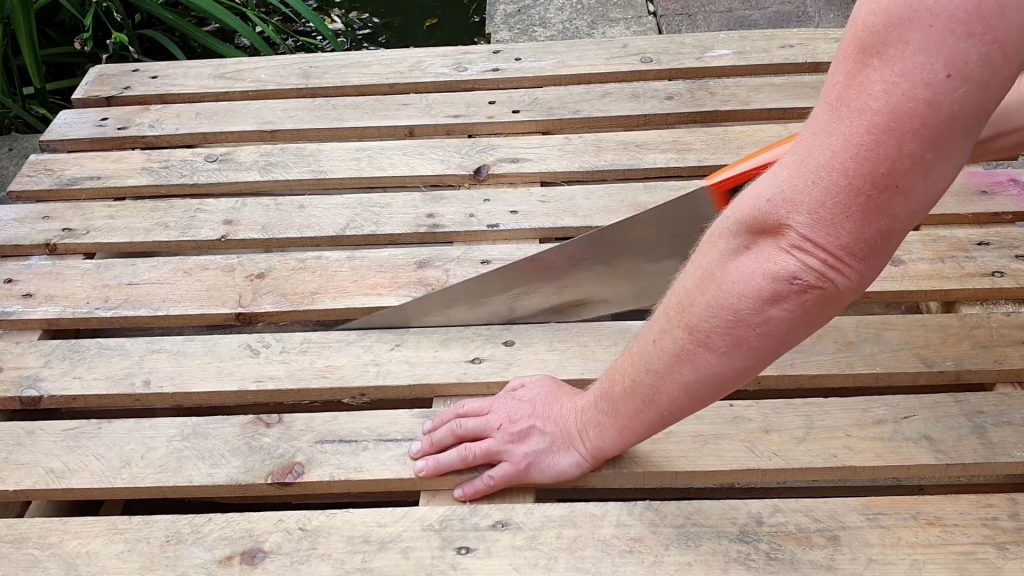
- Once you’ve cut the top pallet in half, take this off and save it somewhere safe.
- You will be using this next, to cut some support planks off, to add to the back rest.
- As pallets come in a range of different sizes, you may need to adjust your cutting measurements here accordingly.
Top Tip
Make sure you always make your horizontal cut, after the second support plank that runs along the bottom of the pallet. You will need to give yourself at least 4cm of protruding plank, as you can see in this picture.
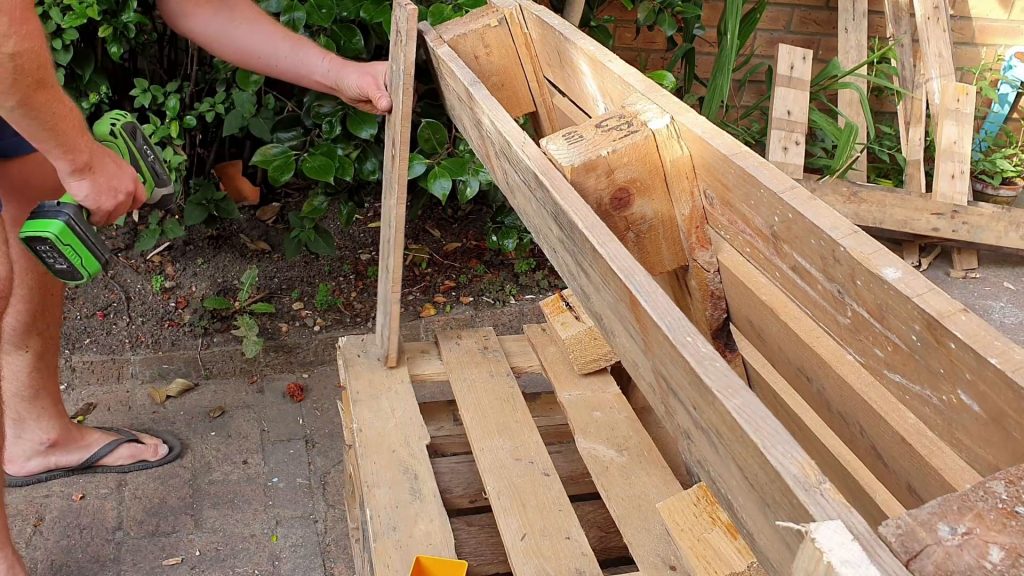
Step Three:
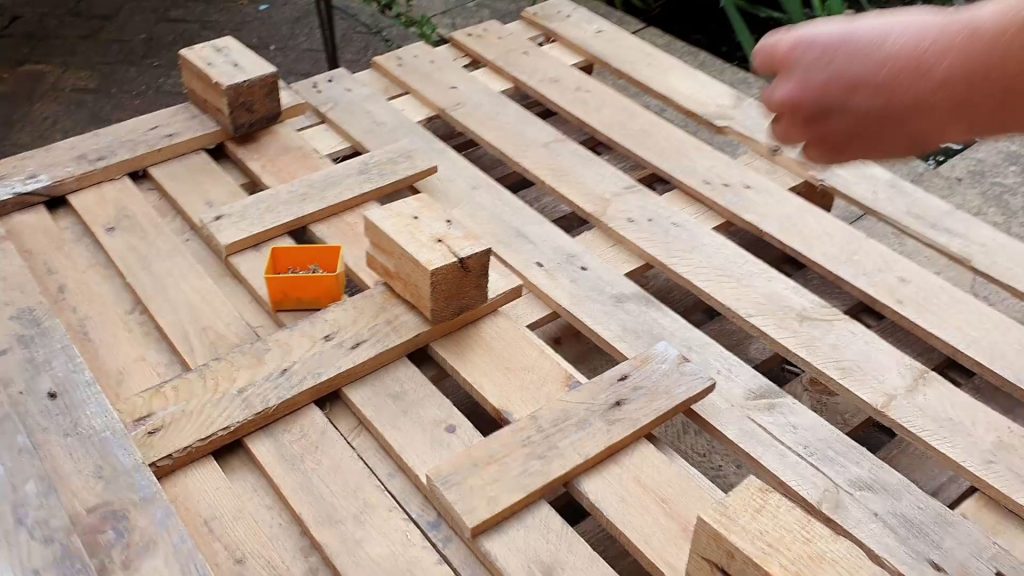
- From the saved half of the pallet, cut off 2 x 30cm planks.
- Flip the back rest over, and drill these two planks to the underside of the back rest.
- Drill the first plank here to the back rest as seen in this picture, using four screws, and aligned with the horizontal back rest plank.
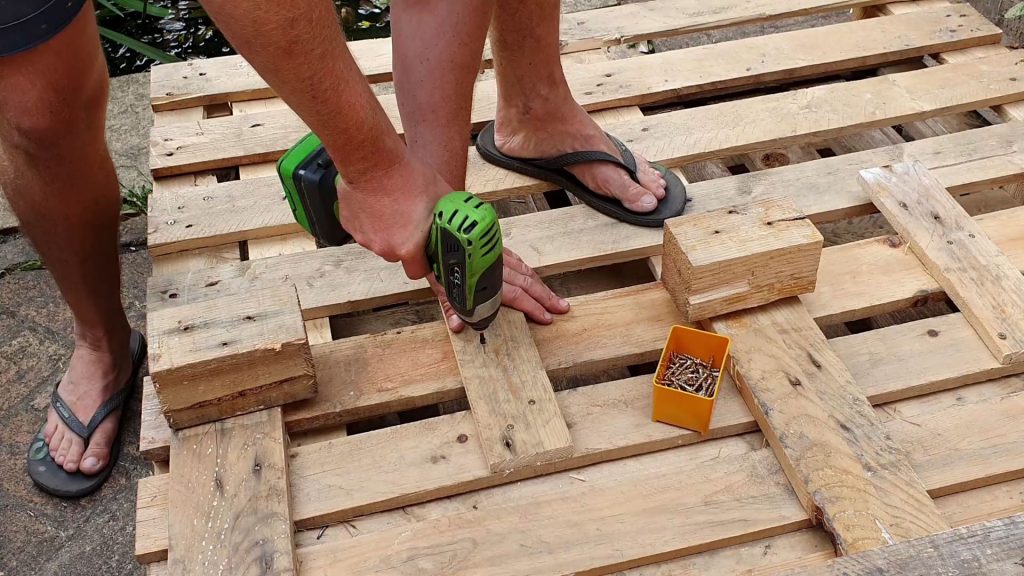
- Repeat with with the second plank, drilled into the other end.
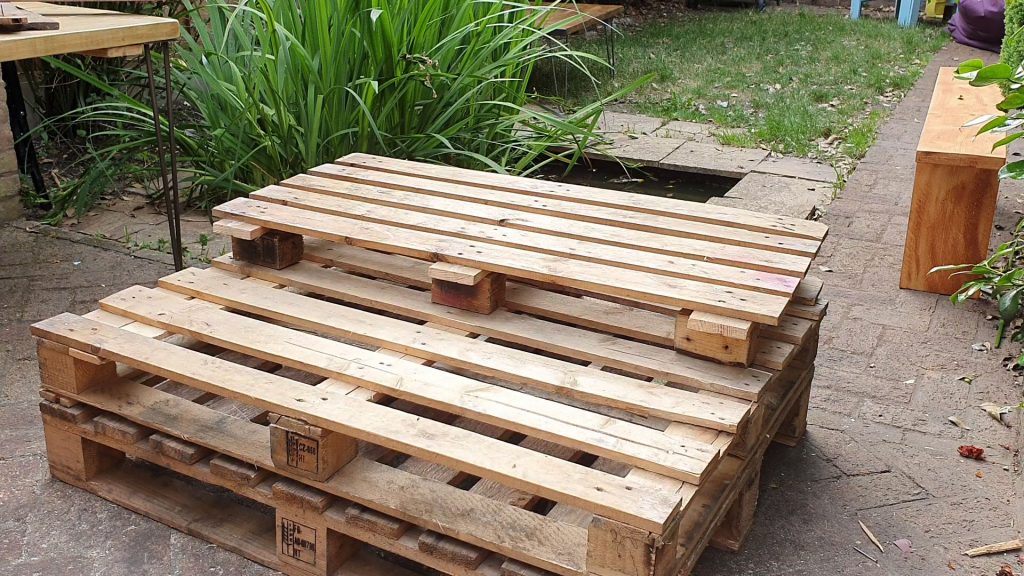
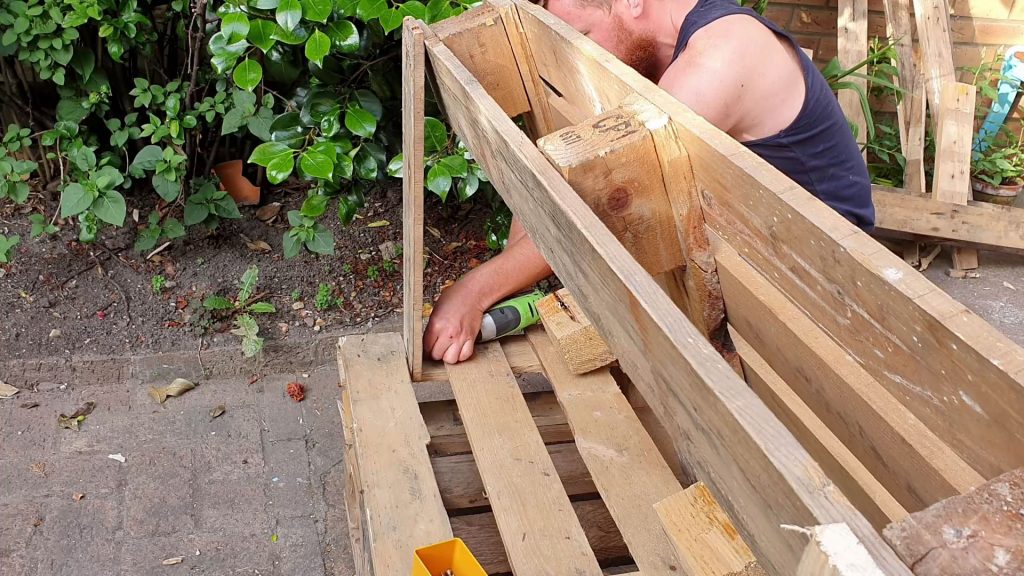
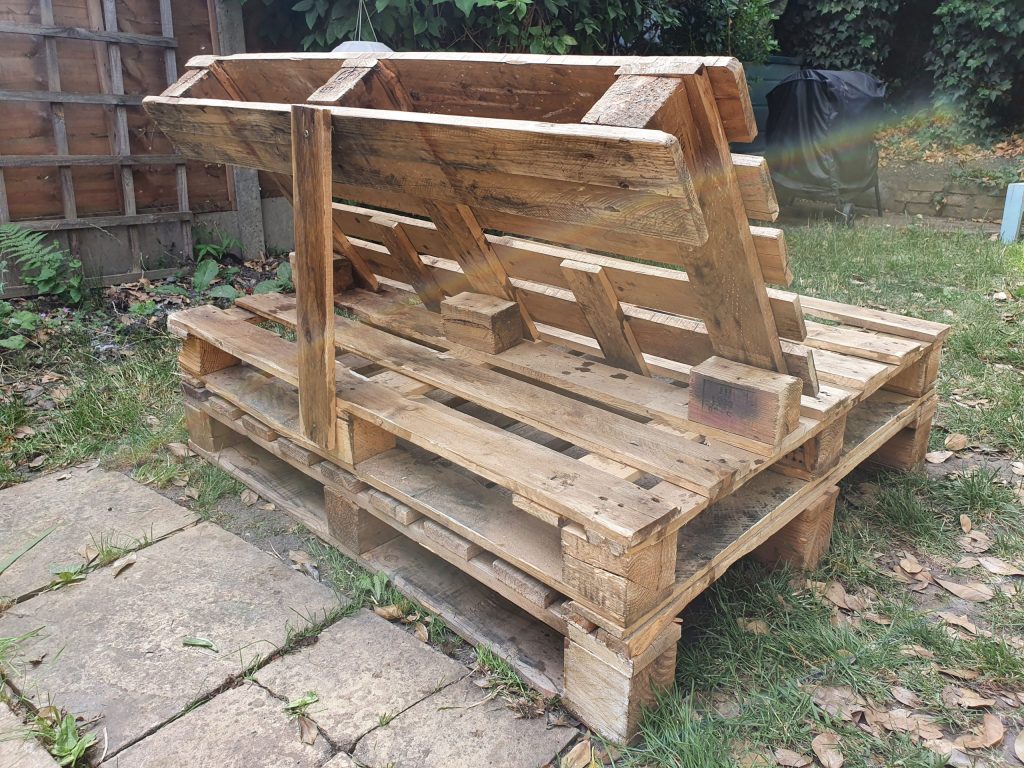
Four:
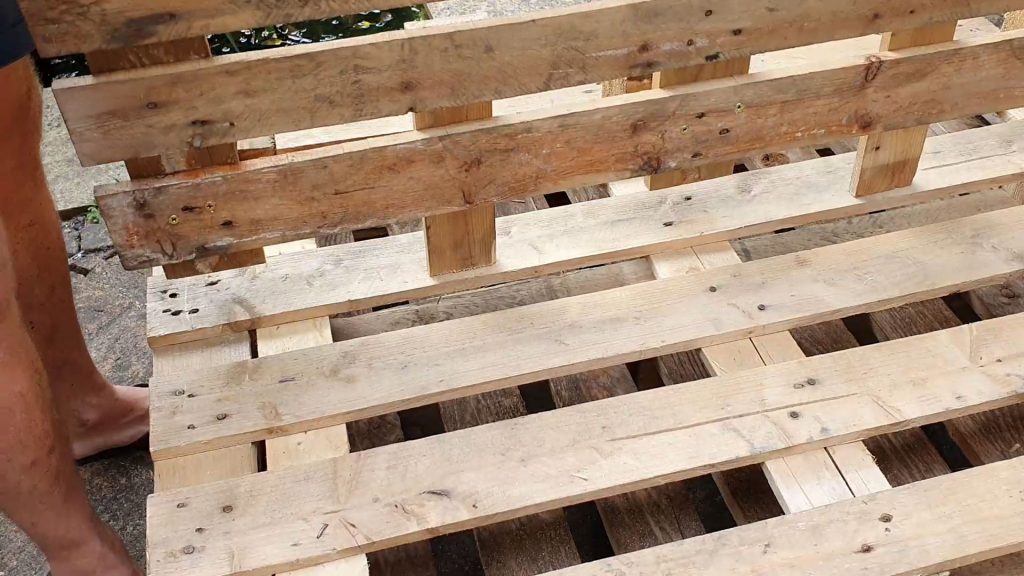
- With the support planks securely fastened to the underside of the back rest.
- Flip the back rest, back over, and slot it into the middle pallet, so its at an angle.
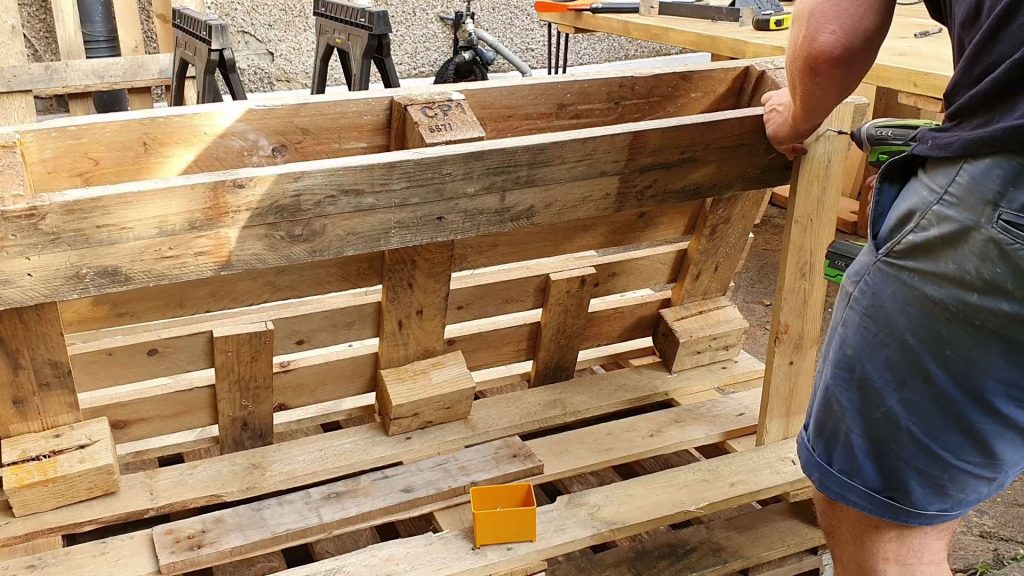
Step Five:
- From the saved half of the pallet, cut another two support planks from this. This time you will need 2 x 52cm planks.
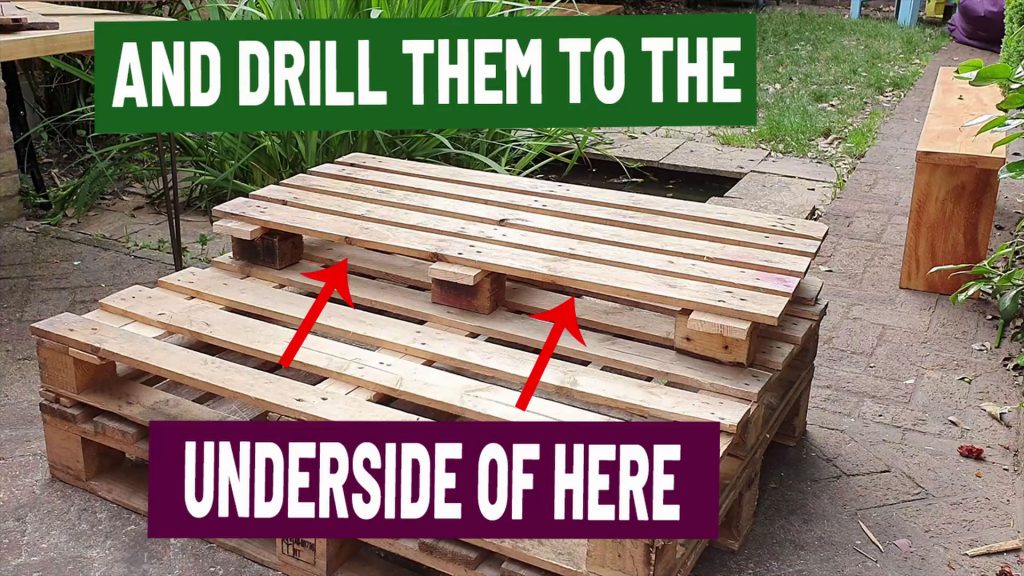
- These will be used back supports, connecting the back rest to the middle pallet.
- Screw in through the top and bottom of the plank into the horizontal slat, as seen in the picture, using four screws in total.
- Repeat, this time screwing in the second 52cm support plank, into the other end of the back rest.
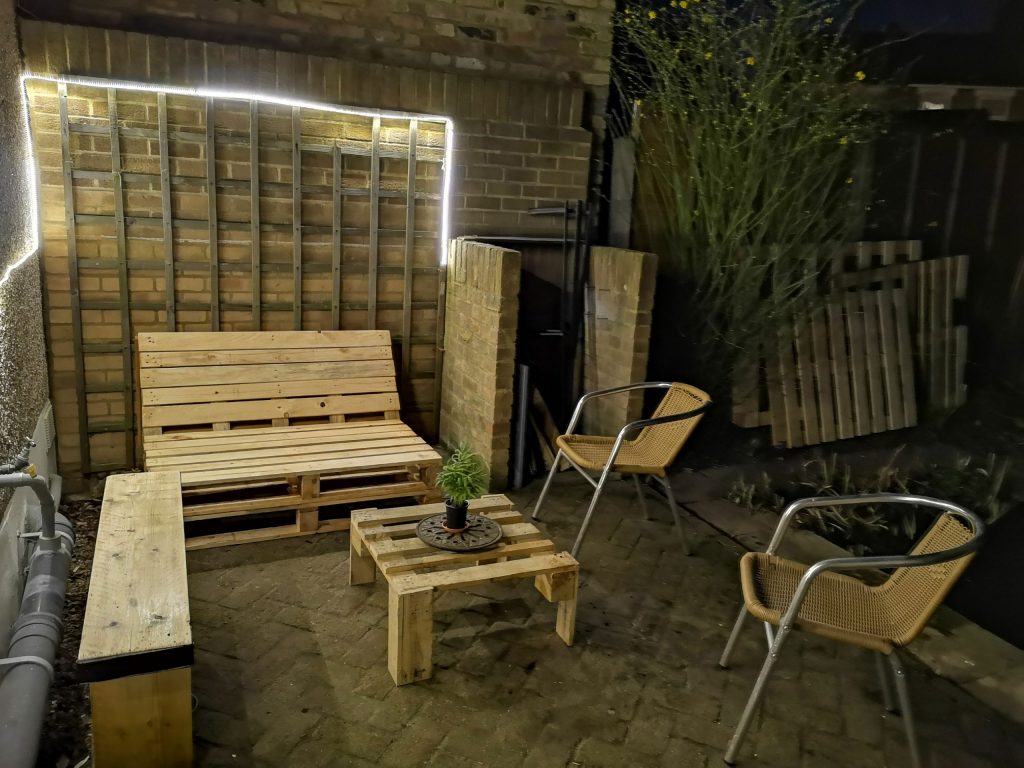
- And you’re done, that’s how to make furniture with pallets for your garden, it’s as easy as that!
Optional Steps for your wooden pallet seat:
These are not essential, but will help add further comfort and style to your garden pallet sofa.
- Pallets can be quite rough, so you may wish to sand your pallets. Use a 120 grit for a smooth finish. You will only need to sand the top ends of the back rest and seat area where they will come into contact with someone.
- Add a variety of wood stains and colours to your sofa. This will add protection from the elements or help brighten up your outdoor space.
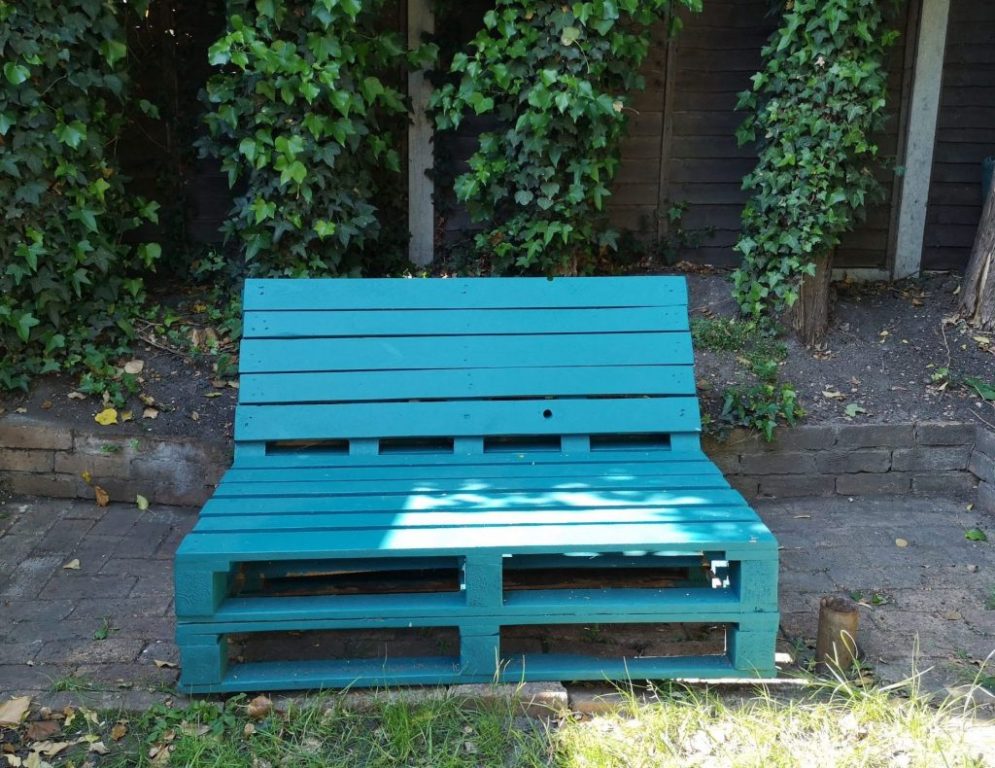
To brighten up this pallet garden sofa, I used teal emulsion paint which I picked up from Amazon. This particular paint is not strictly intended for painting wood, but it’s the brightest colour I could find and works absolutely fine.
Once the emulsion dried, I then added a coat of Rustins exterior varnish, to further protect the pallet, and the emulsion, from the weather.
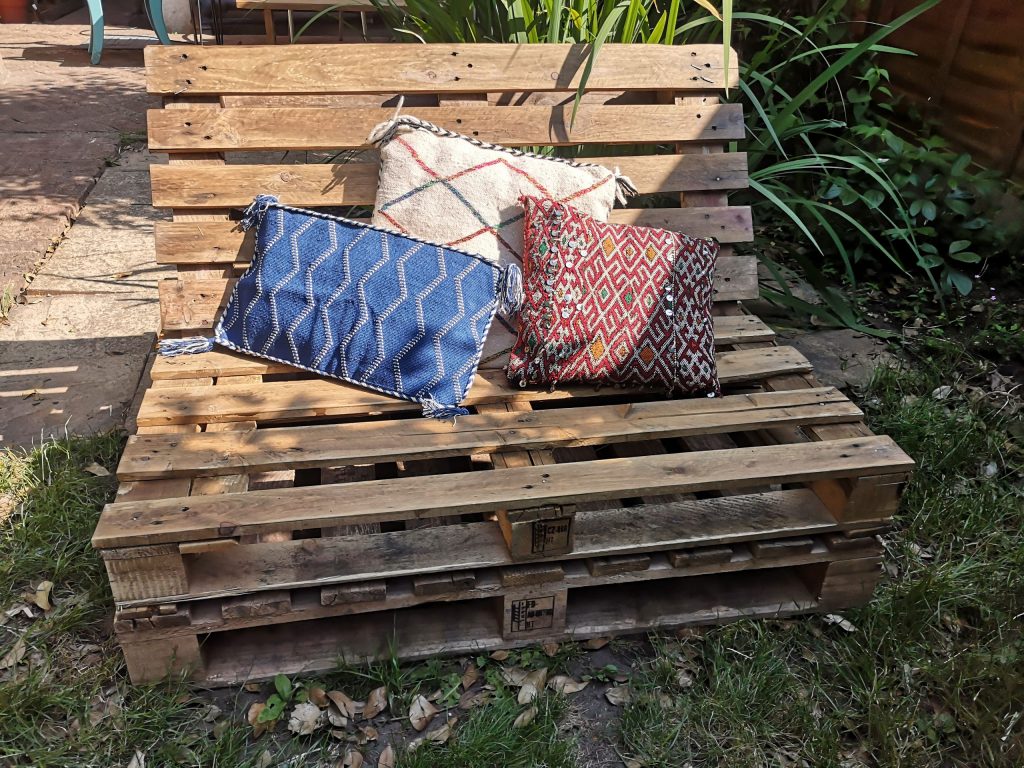
On the pallet I just showed you how to build. I eventually added a light coating of a water downed Dark oak woodstain, to give it this cool rustic look.
Which I then finished off with some Moroccan Kilim cushions for comfort.
Making Furniture with Pallets – DIY Considerations
Pallets are intended for a variety of different things, from transporting meat, to flowers to bags of sand. So, they come in a variety of different shapes and designs.
With this guide on how to make furniture with pallets, you may find you will need to adjust some of these configurations slightly, to accommodate the wide range of pallets available.
- You may need to place your support planks in a slightly different position.
- Or you may need to remove one of the pallets bottom support beams off, for it to slot in correctly.
- So don’t worry too much at all, if you have to alter or chop and change the above slightly.
- Eventually, I adjusted the back support planks. Firstly as a design preference, and realised using just one support plank in the middle, was a lot more stable than using two at the end.
Once you’ve started making your own pallet furniture, hopefully it will spark your creativity into making other furniture around your home.
How to Make a Pallet Sofa Video

Read our full story so far
ABOUT LUKE RICHARDSON
Luke is the chief maker of all the reclaimed wood furniture at Project Reclaim – a small family business that he set up in 2019. He is dedicated to using sustainably sourced materials and helping people bring their furniture ideas to life – as well as helping others DIY their own furniture, using materials around them.
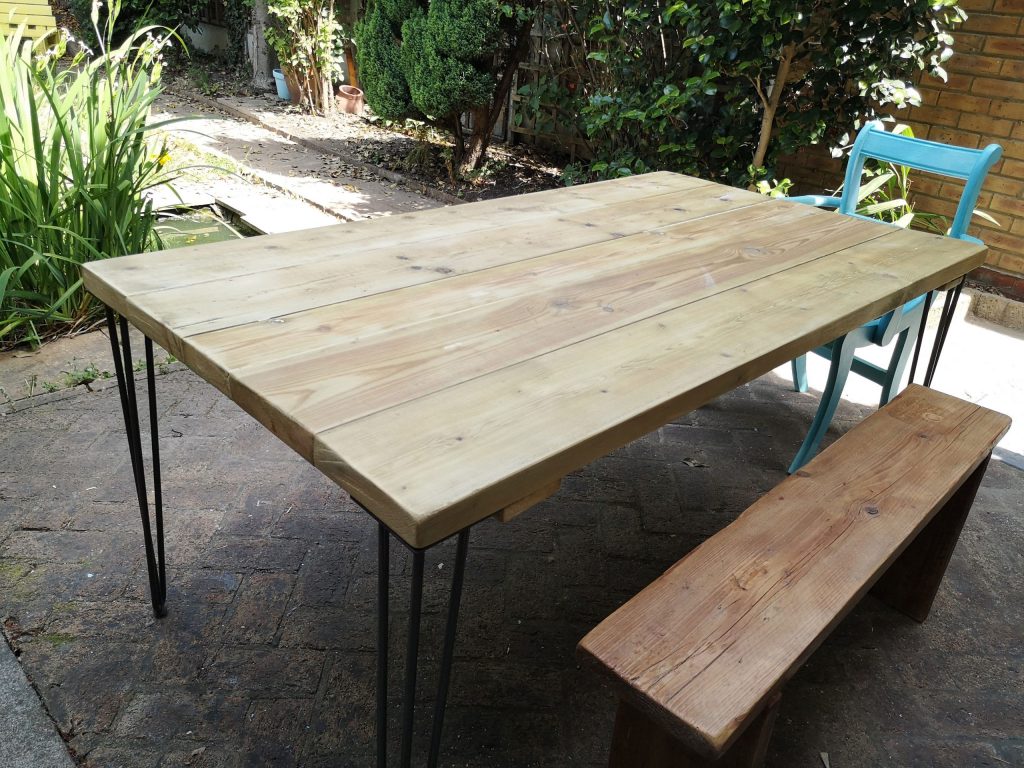
Shop our full range of reclaimed wood furniture.
Subscribe to our newsletter
You kinda lost me at Step 3 😖 and video or more pics…it’s hard to see what you’re doing from the pictures and it’s not making sense to me… I’m probably being a bit thick 😟
Hi, we also have a video on YouTube doing this which might make things easier. Let me know how you get on.
https://youtu.be/X5kXqiueP0Q