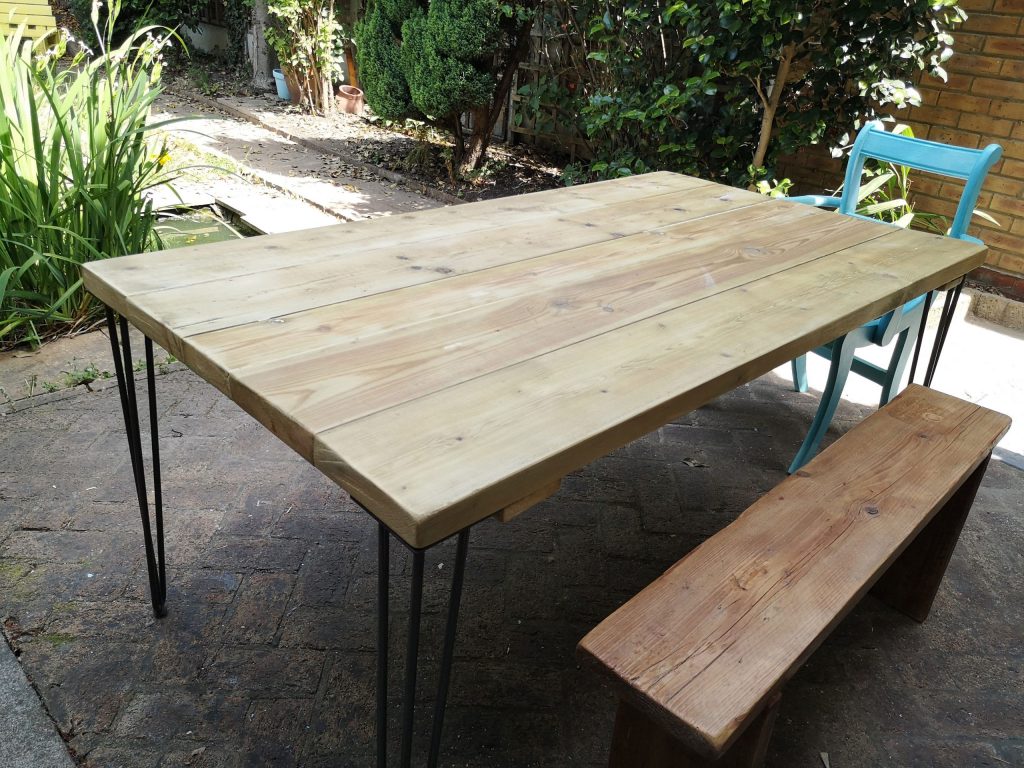
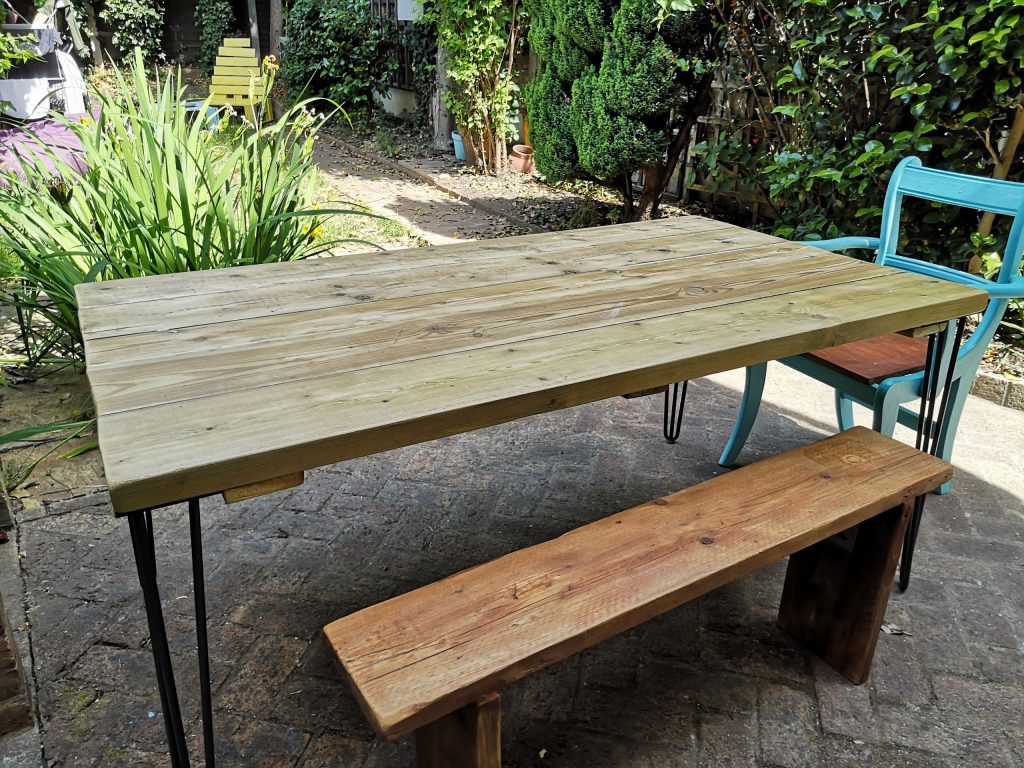
After searching online for a large, chunky, reclaimed wood dining table with hairpin legs, I was immediately put off by the eye watering prices listed for the style of table we wanted for our home.
So, I built our own reclaimed wood dining table, for less than £40.
In this step-by-step guide, I’m going to show exactly how I built this reclaimed wood dining table from scratch. All my designs are fully customisable so you will be able to build a table to fit exactly where you want it to go in your home.
I’ll also show you how to treat the wood for interior as well as exterior use, as during the Summer months I like to take full advantage of the good weather and dine outside.
Getting Started
Here’s a list of materials and tools you will need before getting started.
Tools Required
- Drill
- Wood Screws
- Tape Measure
- Hand Saw
- Sander
- Sandpaper (40 & 120 grit)
Finding reclaimed wood for free
The majority of the wood that I use to build my furniture is reclaimed wood which more often than not, has been sourced for free.
This reclaimed wood dining table is no different, it’s been built from old scaffold boards which I’ve found within walking distance of my home.
Check out this in-depth analysis for all the tips and tricks to help you source your own materials and reclaimed wood for free. Plus extensive research on acquiring wood for the best prices!
Don’t worry if you’re unable to find the exact same wood as I’ve used, as you could also make your table out of old wooden doors, pallets, floorboards, timber beams or cable reel tops.
Plus I’ve listed dozens of different dimensions below that you could potentially build your table too.

Best hairpin furniture legs to use
Now this is where I spent the majority of my budget.
I bought 28″ Hairpin legs (Clear Coat, 3 prongs, 12 mm thick) from the Hairpin Leg Company.
These legs will support a weight of around 120kg, which is around the size of a baby elephant, so this should be more than enough protection for your needs.
You can opt for slightly cheaper 10 mm thick legs but these only support half as much weight.
I would avoid using 2 prong legs for a table, as they only hold 25kg, and will not produce a high quality feel to your reclaimed wood dining table.
If you prefer to use different legs entirely, then I highly recommend using IKEA Lerberg trestle table legs which I’ve used for a table before and cost just £10 for a pair.
Using these will also drive your costs down even further!
Step-by-step guide: Upcycled dining table
A detailed guide taking you through the steps on how to build your own table. As well as a video run through at the bottom of the post.
Step One:
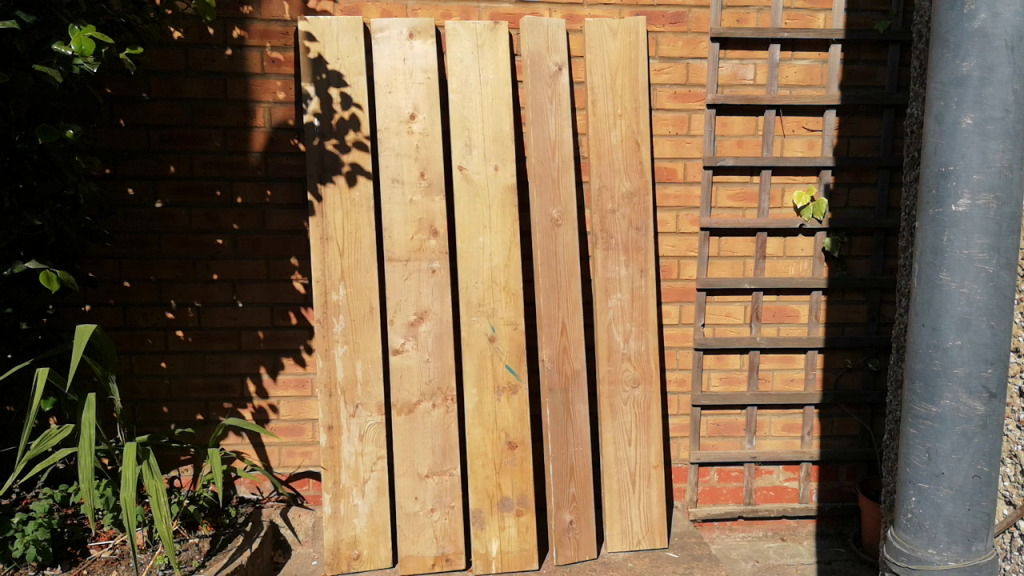
Depending on the condition of your reclaimed wood, you will first need to scrub down your boards and check for any remaining nails or screws in the wood. You will need to use a hammer or pliers to pull these out.
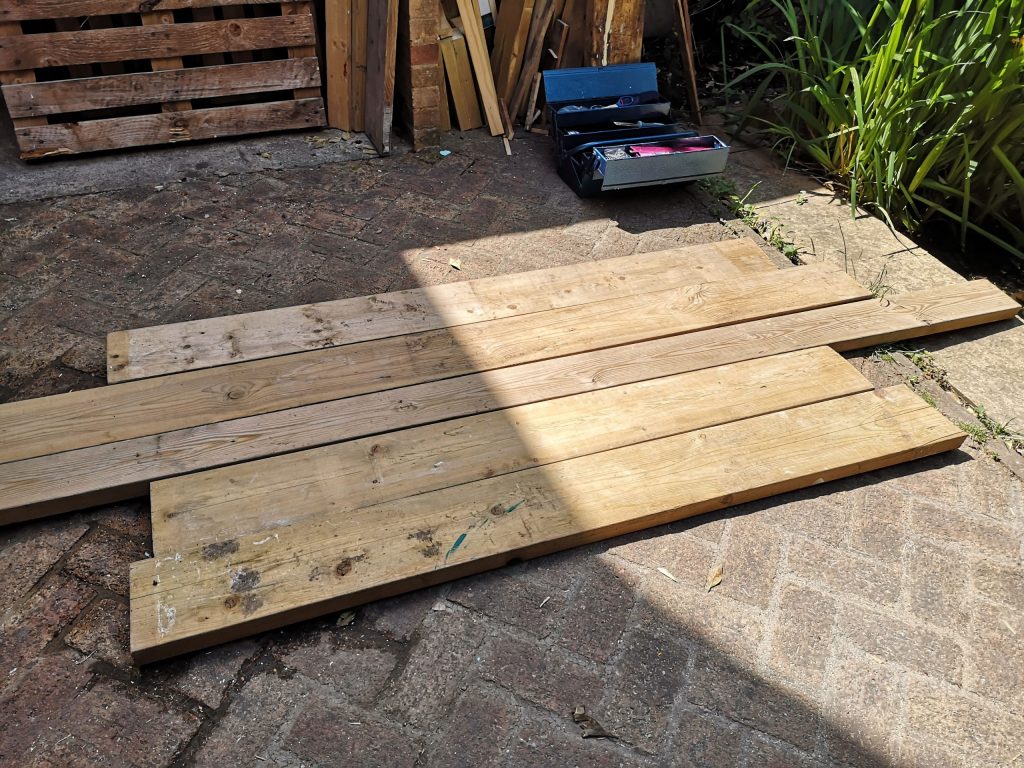
Next, lay your boards on a flat surface, arranging them in order of how best the planks look together side by side.
Keep in mind that any planks with notable holes, blemishes or cracks in the wood, which can’t be easily fixed, will need to be on the underside of your table out of view.
Step Two:
Measure your wood to the desired length of your table.
In this case, I’m measuring each of my scaffold boards to 165 cm in length.
Whilst the support beam blanks will need to match the width of the table surface, 91.5 cm.
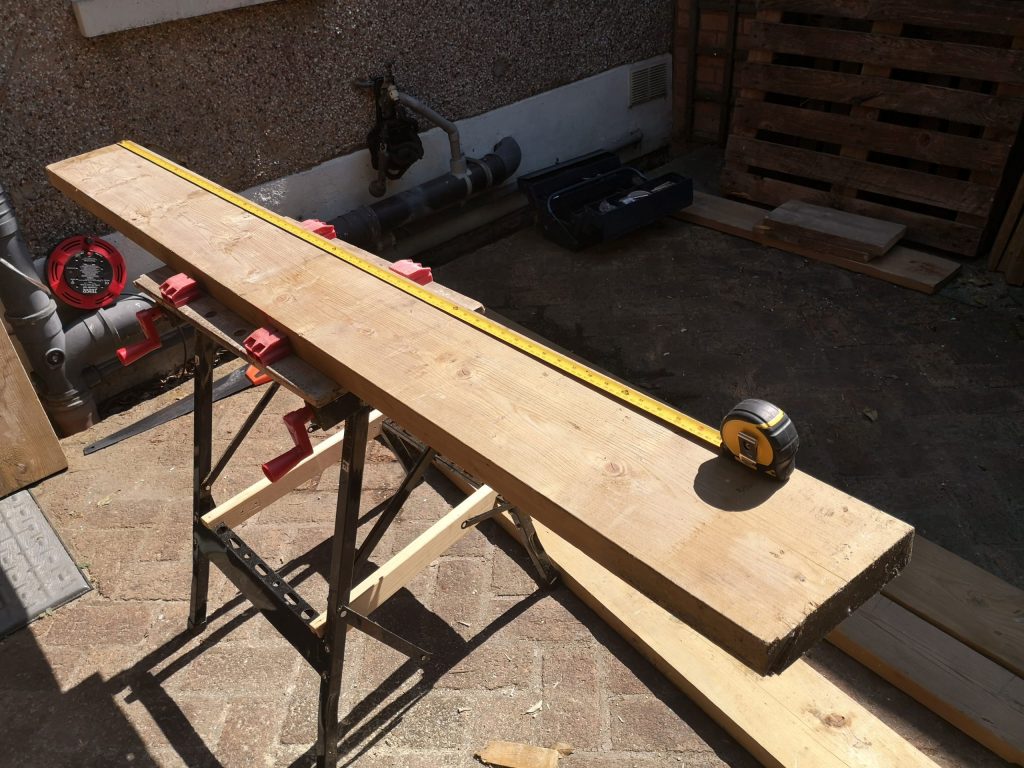
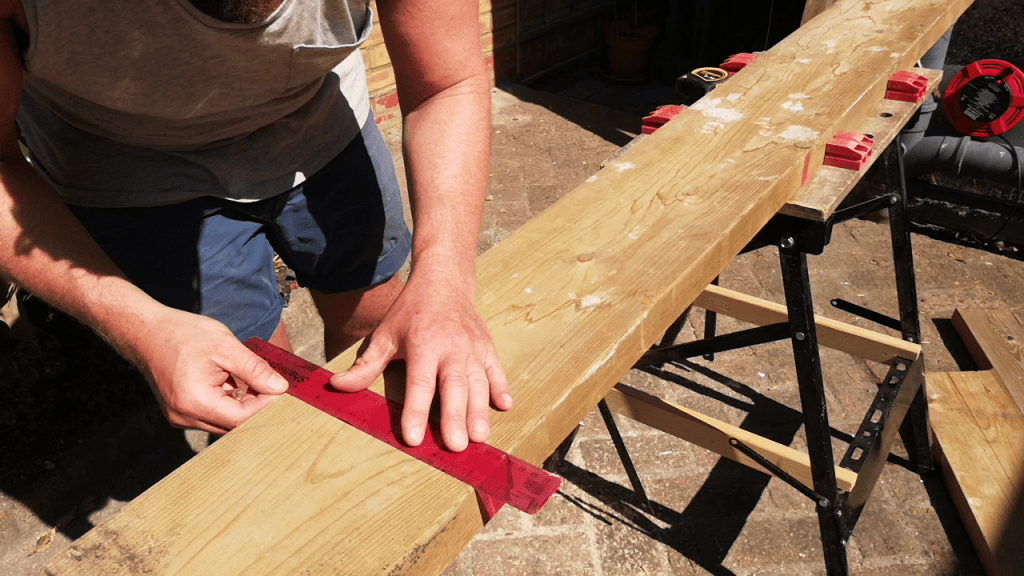
Cutting through large, chunky pieces of wood with a handsaw, it takes some skill and planning, to cut all the way through in a straight line.
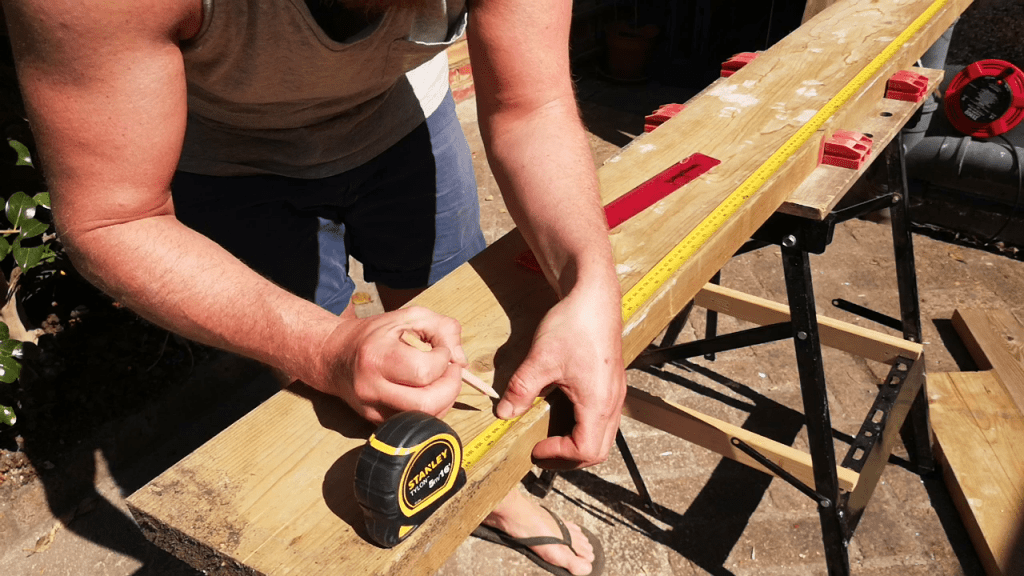
To cut in a straight line, use a pencil and ruler to draw lines all the way around the circumference of the wood, so every side of the wood where you intend to saw has a guideline.
Marking out every side of your planks will take you slightly longer, but it will be much better in the long run than trying to fix it down the line.
Step Three:
Take your handsaw and cut through your wood.
Whilst sawing, flip your planks at various intervals, and cut along your marked guidelines from a different side of the plank.
Cut through a quarter of the plank from one side, then a quarter from another and so forth, until they meet in the middle.
This is how to stop cutting through wood at a tangent with handsaw, so you end up with a clean, straight line.
Repeat steps 2 and 3 until you’ve cut all your scaffold boards and support beam planks of wood to the desired lengths.
Step Four:
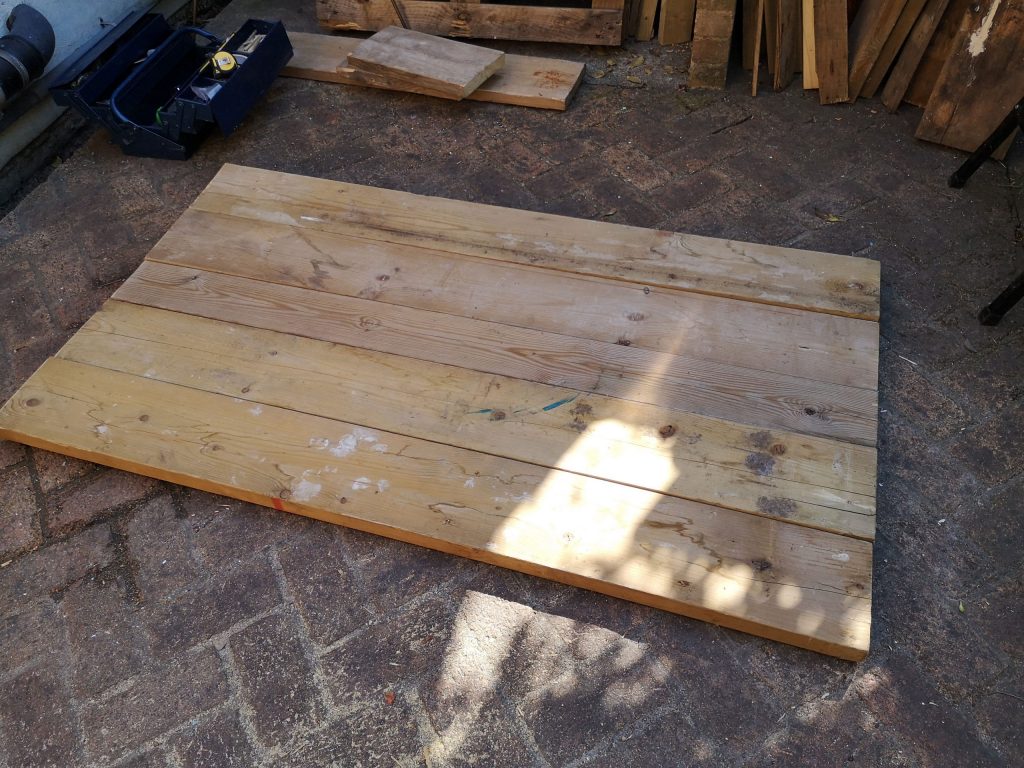
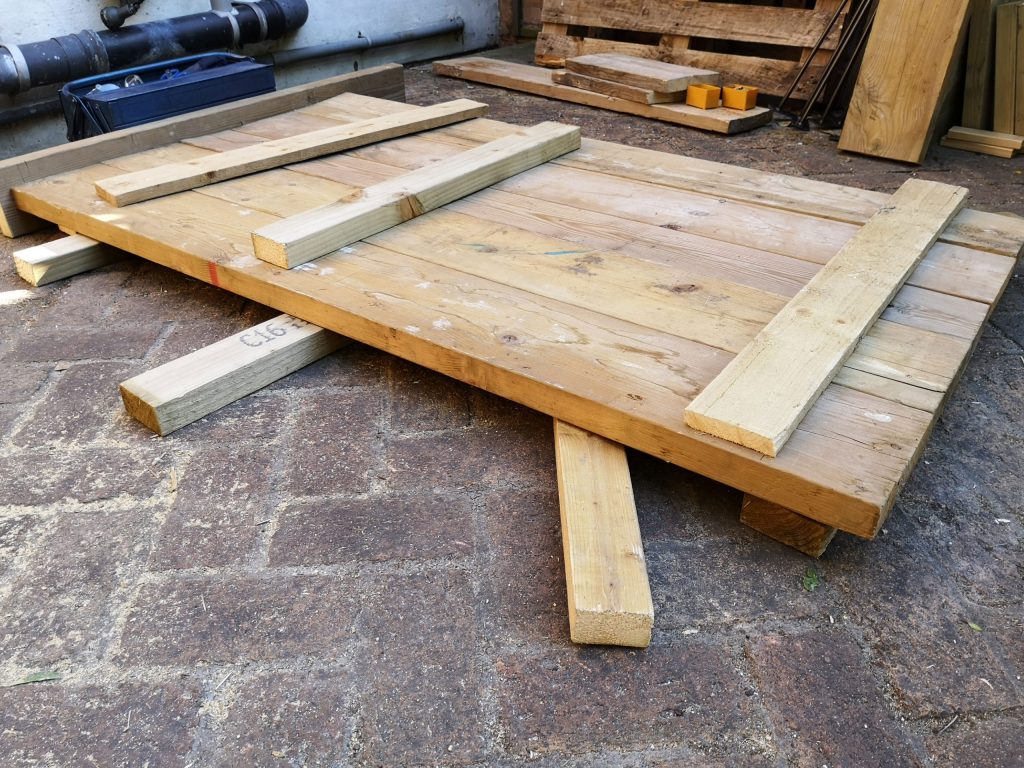
Lay your cut planks of wood down on a flat surface once more.
This time, with the sides of the plank that you want to use as the table top surface, facing downwards.
Next, place your support beams across the back of the table width ways.
Place one beam directly across the middle of the table.
And the other two at either end, leaving enough room for the hairpin legs to be able to be screwed into the corners.
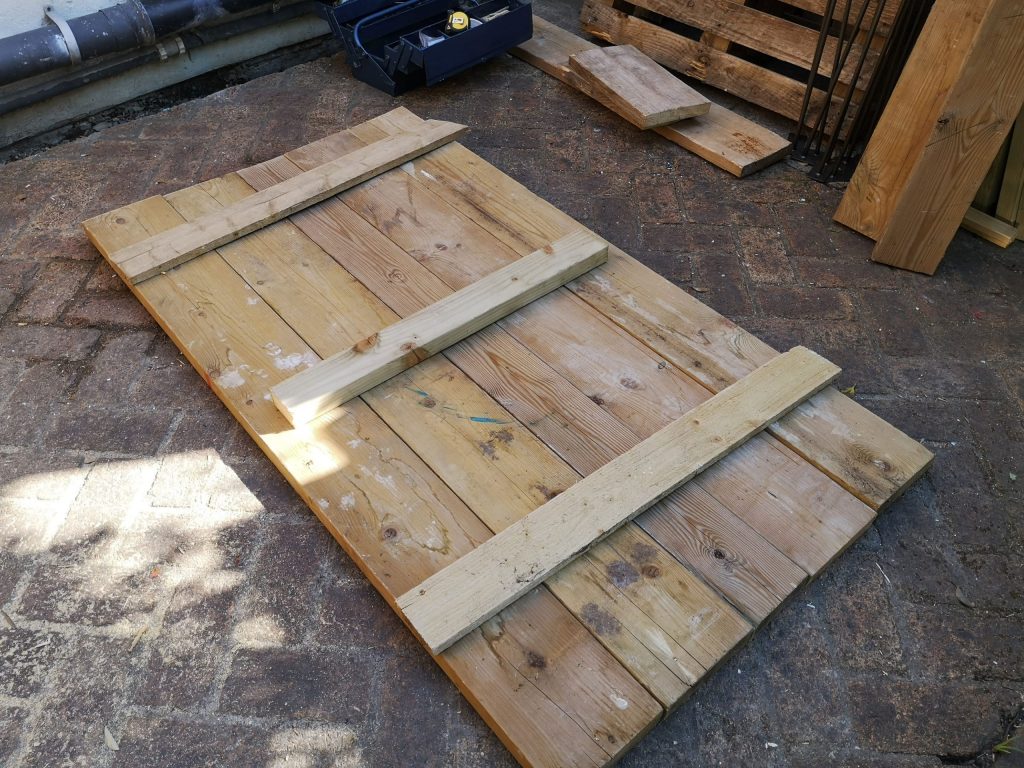
As the weight of the wood I was using for my table was on the heavier side, I’ve used a slightly thicker beam for the central support to add some further stability.
This piece wasn’t the exact same width as the table, but as long as it covers some of the outer boards, it works absolutely fine.
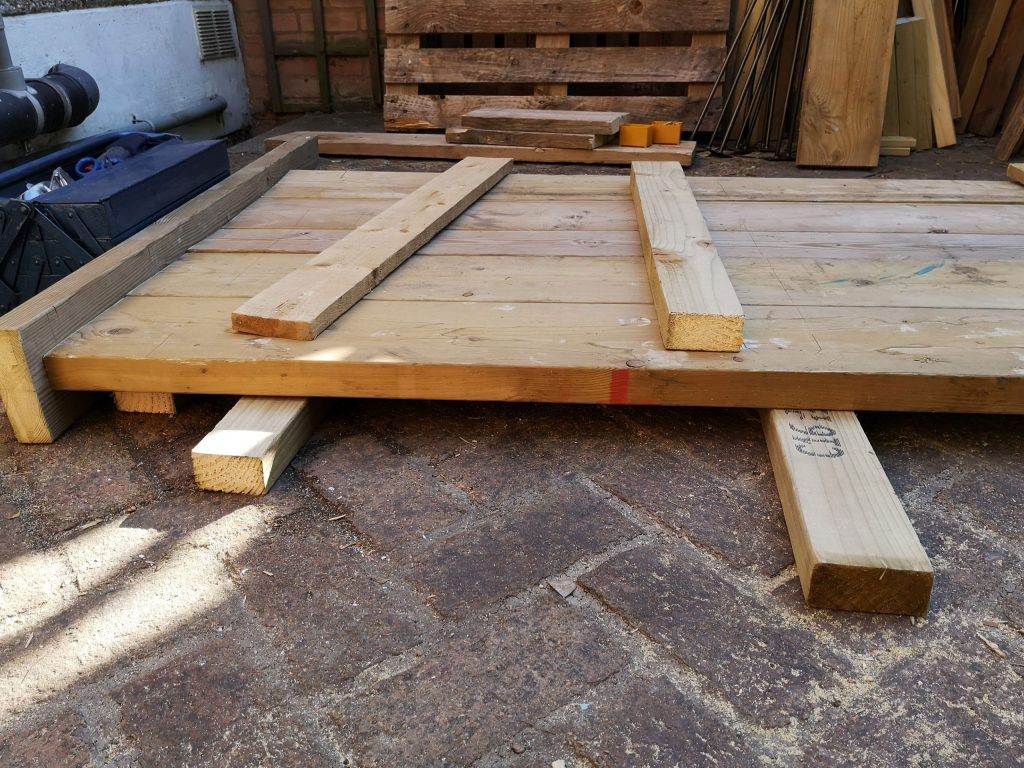
If your ‘flat surface’ turns out to be not so flat, like mine!
Place some different planks of wood underneath the table top to elevate it, as this will make it easier screwing in the support beams.
Also add some weight to one end of the table top, this stops them from moving when you align the planks. I used a toolbox and another plank of wood as a makeshift weight.
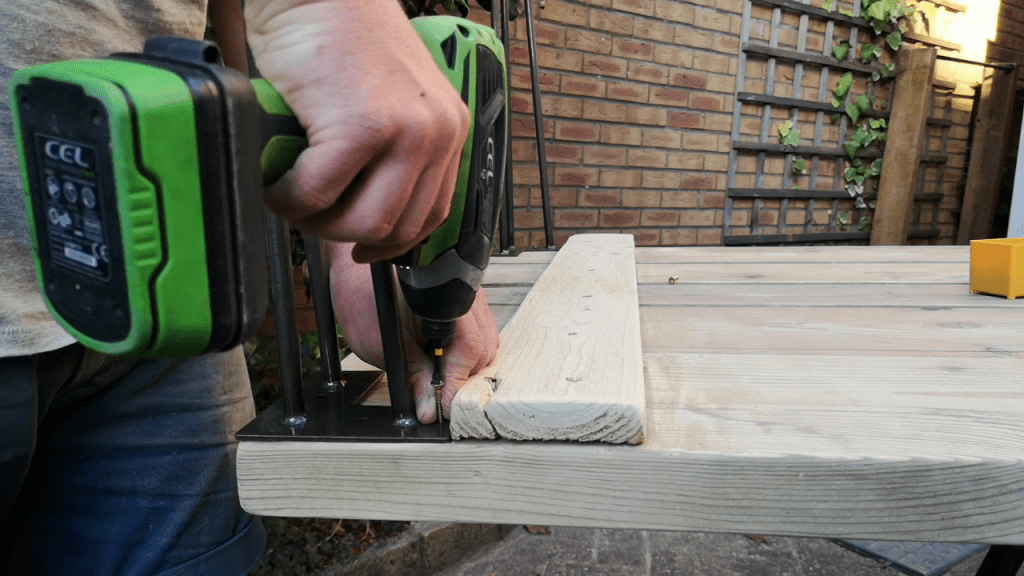
Once you have all your various supports in place, use your drill to screw the support beams to the bottom of the table top.

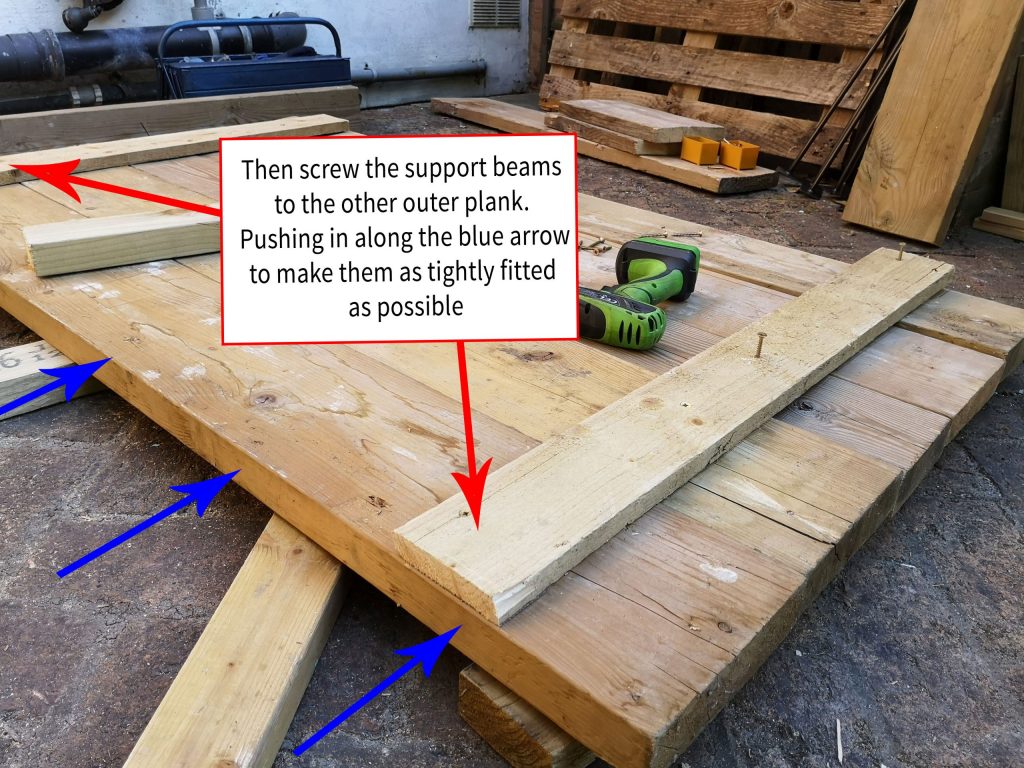
I used ten screws per support beam, drilling in two screws per plank to the beam.
You may find you have to unscrew and realign some of your boards as you work through them. This is absolutely fine as it’s best to get the boards as level and aligned as much as you can.
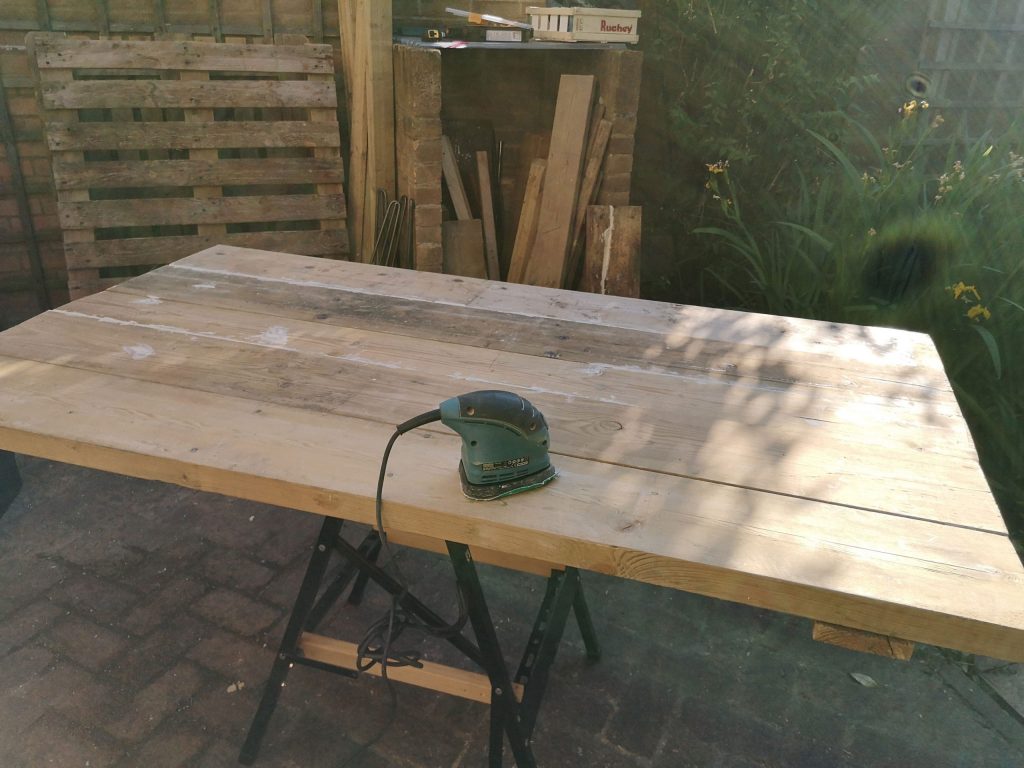
Step Five:
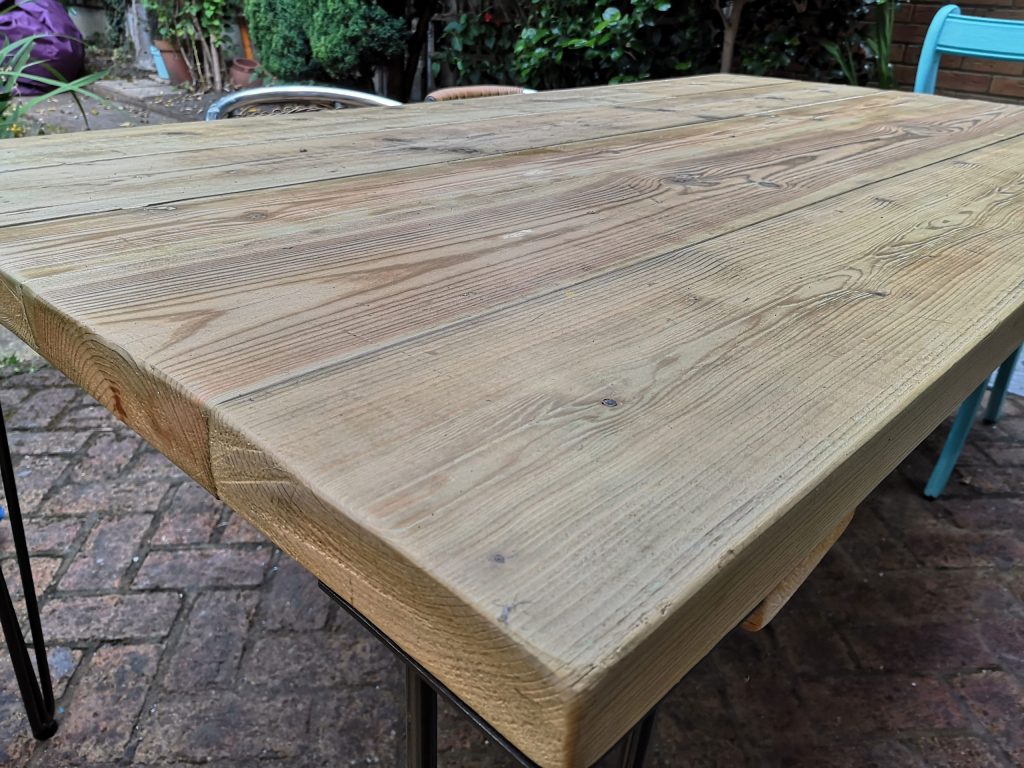
Time to sand your wood.
The boards I found were in good condition, so I used an 80 grit, followed by 120 grit to add a smooth finish.
If you have particularly rough wood, start with 60 grit and then work your way up.
Pay particular attention to the corners and top surface of the table, as these are the areas that will come into the most contact.
Optional: Before sanding use wood filler to to plug in any holes or gaps between the boards.
I use Ronseal Multi-Purpose Wood Filler which you can pickup from Amazon.
Step Six:
Screw the four hairpin legs into the table, fastening one in each corner to the bottom side of the table.
Step Seven:
Once all four of the hairpin legs have been attached, you will need to add a varnish.
There’s a variety of different varnishes and stains that you can use to add a finish to your wood.
As I’m going to be using this reclaimed wood dining table outside for the Summer months, I used Ronseal Exterior Varnish Matt Clear which you can pickup from Screwfix.
After the first coat had dried, I added a second to the top surface for extra protection.
TO RECAP:
- Clean & check your boards for nails, arrange boards on floor in order of assembly
- Measure your pieces of wood
- Cut the wood to correct measurements
- Screw the support beams to the table top
- Sand using 80 then 120 grit
- Screw in the hairpin legs
- Varnish your table
How to Build a Table Video

Read our full story so far
ABOUT LUKE RICHARDSON
Luke is the chief maker of all the reclaimed wood furniture at Project Reclaim – a small family business that he set up in 2019. He is dedicated to using sustainably sourced materials and helping people bring their furniture ideas to life – as well as helping others DIY their own furniture, using materials around them.
Shop our full range of reclaimed wood furniture.
Subscribe to our newsletter

